

[section label=”Introduction” anchor=”Introduction”]Introduction
Paintball has seen a bit of a shift over the last several years as magazine fed marker technology has improved. Parallel to magfed’s increasing popularity is that pump has seen a fierce resurgence as well and is as popular as ever before. So why not combine the two? That, in a nutshell, is what Kingman did with the Spyder Hammer 7 marker: a magazine fed pump action milsim style marker built and priced as an entry level marker.
The Hammer 7’s slim profile, low cost and pump action has encouraged intrepid modders to come out of the woodwork to hack the platform into a myriad of configurations rarely seen on the field. Whole communities have sprung up around the unassuming marker to share and encourage others to build their own custom configuration ranging from Frankenstein builds to elegant sniper configurations that would make real steel marksmen jealous.
This guide is intended to provide a great starting place for new and veteran players alike to find commercial off the shelf, bolt on modifications as well as find inspiration if they feel confident enough to hack their marker into a shotgun or a sniper rifle platform.
[section label=”The Marker” anchor=”The Marker”]The Marker
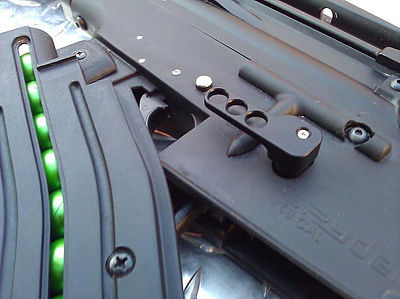
The Hammer 7 is a Nelson Based pump action marker that can be switched between hopper fed and magazine fed using Spyder’s new (at the time of release) Dual Loading Capability (DLC). Unlike Spyder’s Dual Loading System (DLS) that can be switched on the fly, their DLC system can only be switched off the field, requiring an allen wrench to remove a top plate and physically rotating an internal part.
The overall styling of the marker resembles a shotgun, which some enterprising modders have taken and absolutely ran with (see below). On top is a picatinny accessories rail. Like other Nelson based markers, the ASA is located on the back of the marker as opposed to a grip mounted ASA commonly found on markers in the same price bracket.
Marker: Hammer 7
Manufacturer: Spyder
Marker Type: Magazine Fed Pump Marker
Valve Type: Nelson
First Strike Capable?: Yes
[section label=”Magazines” anchor=”Magazines”]Magazines
First Strike Compatible
$25 ea

Not First Strike Compatible
Discontinued by Manufacturer

First Strike Compatible
$100-140 ea
[section label=”Bolt On Upgrades” anchor=”Bolt On Upgrades”]Bolt On Upgrades
Here are a few upgrades/modifications you can buy and bolt on without having to cut, drill or sand your Hammer 7.
Legend:
Cost:
$ = <$50
$$= $51-$100
$$$=$101-$200
$$$$=$200+
Straight ASA
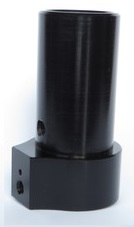
Mod Type: Aesthetics, Functionality
Technical Difficulty: Low, requires marker disassembly
Time to Complete: <15 minutes
Modification Cost: $
On/Off ASA Adapter
Description: Some builds make it a multi-step process to remove a tank when storing the marker in between trips to the field. Leaving a pressurized tank on your marker during storage wears out springs and o-rings faster. This On/Off adapter installs between your marker and tank to provide a way to turn off the air supply to the marker, removing pressure from the internals and thus extending the life of your marker.
Mod Type: Functionality
Technical Difficulty: Low
Time to Complete: <5 minutes
Modification Cost: $
In Stock Tank
Description: Allows the installation of a Tiberius or RAP4 In-Stock Tank adapter to be installed on the Hammer 7.
Mod Type: Capability, Aesthetics
Technical Difficulty: Low
Time to Complete: <5 minutes
Modification Cost: $
Adapter + tank stock: $$
Clamping Feed Neck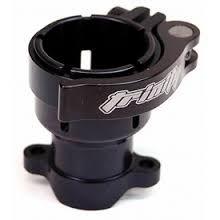
Description: If foregoing the magazine fed style of play, upgrade the stock feed neck with a clamping one. You’ll be glad you did!
Mod Type: Functionality
Technical Difficulty: Low
Time to Complete: <15 minutes
Modification Cost: $
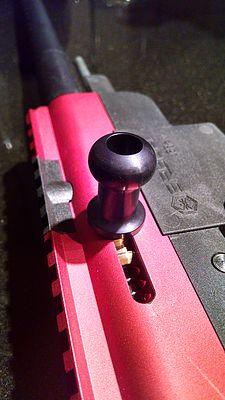
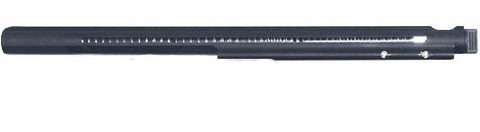
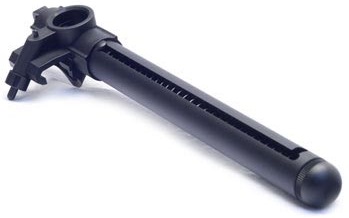
Description: Used in Sniper builds, bolt handles are a necessity. JL Fabworks has one for sale on their website for your sniper project.
Mod Type: Functionality/Aesthetics
Technical Difficulty: Low
Time to Complete: <5 minutes
Modification Cost: $
Description: Another product from JL Fabworks, this modification extends the magazine release for quicker and easier magazine changes
Mod Type: Functionality
Technical Difficulty: Medium
Time to Complete: ~20 minutes
Modification Cost: $
[section label=”Optics” anchor=”Optics”]Optics
Scopes/Sights
Leapers UTG 4×32 Pro 5-Step Reticle Crossbow Scope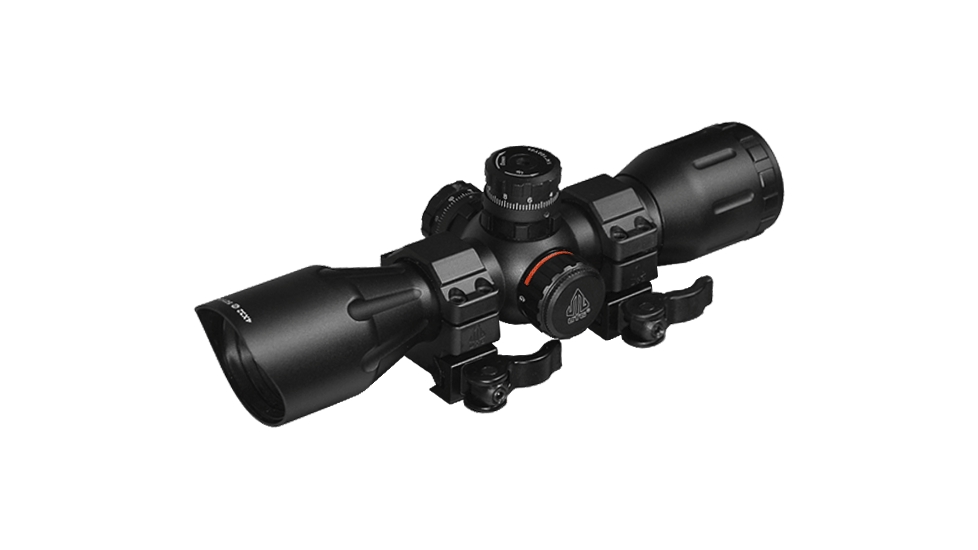
Description: This is but one example, due to similar trajectories many Hammer 7 owners prefer a crossbow scope.
Mod Type: Function, Aesthetics
Technical Difficulty: Low
Time to Complete: <5 minutes
Modification Cost: $$-$$$$+

Description: There are tons of options for rifle scopes, this is just an example. NCStar scopes are fairly robust and affordable when compared to a lot of other scope manufacturers.
Mod Type: Function, Aesthetics
Technical Difficulty: Low
Time To Complete: <5 minutes
Modification Cost: $$-$$$$+

Description: Red dot sights are just as bountiful as rifle scopes and usually found on shotgun style Hammer 7’s. Don’t let that stop you for your Sniper build, though, as they can work equally as well there.
Mod Type: Function, Aesthetics
Technical Difficulty: Low
Time To Complete: <5 minutes
Modification Cost: $$-$$$$+
[section label=”Barrels” anchor=”Barrels”]Barrels
These are the most popular and most recommended barrels for the Hammer 7. Any Spyder threaded barrel will fit/work with the Hammer 7 giving you a large market of barrels and barrel sizing kits to fit your needs, aesthetics and play style.
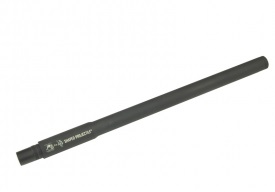
Length: 16″
Bore Size: .687
Cost: $$
Length: 14″
Bore Size: .683
Cost: $$
Spyder Hammer 7 Stock Barrel
Length: 12″
Bore Size: Unknown
Cost: (included with marker)
The stock Hammer 7 barrel is a fantastic barrel in its own right. A lot of players stick with the stock barrel for their build as the looks and performance are pretty good out of the box. As always, flex honing the barrel can potentially improve performance.
[alert variation=”alert-danger”]NOTE: The modifications presented in the following sections are permanent, non-reversible and WILL void your Spyder warranty. PaintballTech.Net does not endorse nor encourage making these modifications. This section is to demonstrate what other players have done to suit their individual needs and desires. Should you choose to make these modifications PaintballTech.Net cannot be held liable for any damages or consequences resulting from individuals attempting the following modifications.[/alert]
[section label=”The Shotgun Build” anchor=”The Shotgun Build”]The Shotgun Build (The Bodi Build)
As mentioned above the Hammer 7 is stylized to loosely resemble a combat shotgun. Several enterprising individuals took it upon themselves to improve upon that look. Enter Jason Bodi (pronounced boh-d-eye) whose Hammer 7 “Warlord” build has captured other player’s interests and ignited their own passions to imitate it. Jason may not be the first to modify his Hammer 7 in such a fashion, but the sheer amount of work and detail has certainly made it the go to template for a Hammer 7 shotgun build.
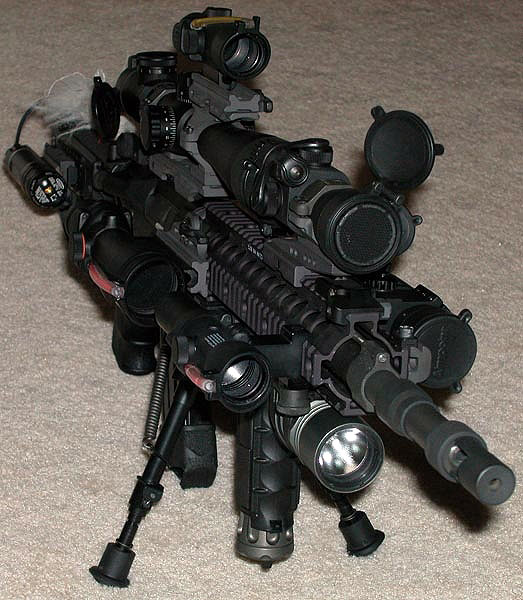
[section label=”The Sniper Build” anchor=”The Sniper Build”]The Sniper Build
The Hammer 7 is a (mostly) square narrow bodied marker, especially when you exclude the pump handle. This narrow profile has lent itself to slotting into various long rifle stocks (with heavy modifications). There are as many “Sniper” builds as there are stocks, all you have to do is Google “Spyder Hammer 7 Sniper” to see the myriads of stocks this humble marker has been dropped into. Some range from quick, cheap and dirty all the way up to hundreds of hours spent getting the marker to fit perfectly and look just so .
Part of the point of the sniper build is to do away with the pump handle up front, instead going for a bolt action style modification. A major problem with this is that the marker is designed to apply pressure to both sides of the bolt; when changing it over to a bolt action rifle you’re changing it to pump from one side of the bolt only, causing wear on the bolt that it was not designed to handle. A decent bolt action handle is usually sufficient to apply mechanical force on the bolt without torquing it the wrong way. Some players went so far as to build a frame or harness that connects to both sides of the bolt, but allows them to cock it one handed.
[section label=”Lever Action Build” anchor=”Lever Action Build”]Lever Action Build
What’s a stock-based rifle or shotgun without a little lever action? Not as popular of a build due to the difficulty of the lever action, some dedicated and enterprising individuals took it upon themselves to recreate this once ubiquitous cocking action into their Hammer 7 builds. An example of this build can be seen in the players gallery below.
[section label=”Feed System Modifications” anchor=”Feed System Modifications”]Feed System Modifications
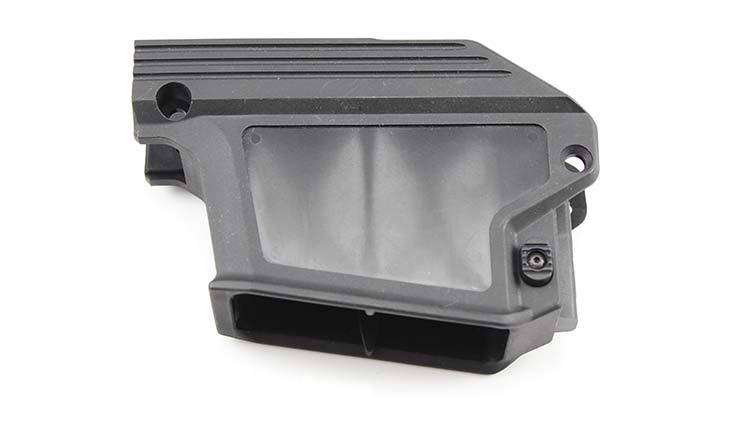
Description: DMAG’s and Helix mags are very well received by players, as such modders have taken MCS magazine wells and installed them on their Hammer 7’s. There are multiple MCS magazine wells, be sure to research each to ensure you find one that suits your project.
Cost: $
Description: Dye magazines are very well received by players as well, and like the MCS magazine well there are players that have modded their Hammer 7’s with a DYE DAM magazine well.
Cost: $
Description: As of publication I couldn’t find a separate magazine well for Tippmann Trufeed magazines. Instead, Nova Tactical Designs has an adapter that slips into the existing magwell that allows you to use Trufeed magazines, including Stark Pursuits’ Zeta Magazines.
Cost: $
Description: Used for Shotgun builds. Not designed to bolt directly onto the Hammer 7 as it requires a collar over the feed hole on top of the marker as well as a bracket to hold the backend of it to the end of the barrel. NOTE: The deflector at the end of the tube isn’t optimum, multiple players have reported that paintballs often get stuck before feeding into the breach.
Cost: $
Description: Similar to the MCS feed tube, enterprising players have hacked this onto their Hammer 7 markers.
Cost: $; discontinued by manufacture Spring 2016, limited to stock on hand at various online shops.
[section label=”Magazine Mods” anchor=”Magazine Mods”]Magazine Mods
Change the spring
Description: Some players have swapped out the spring for another one in order to address the magazine follower issues. Others have modified the stock spring by either cutting the spring, or stretching it out. As of publication I do not have sufficient evidence to support the claims of either mod, proceed at your own risk.
Mod Type: Performance
Technical Difficulty: Low, requires magazine disassembly
Time to Complete: 30 minutes
Smooth Paintball Channel
Description: The follower gets caught up inside the magazine sometimes, especially when there’s dirt/grim lodged in there. Some players have taken it upon themselves to disassemble the magazine and polish the paintball channel to decrease resistance on the follower, and as a result (hopefully) reduce the number of feed issues.
Mod Type: Functionality
Technical Difficulty: Medium; requires magazine disassembly and attention to detail
Time to Complete: >30 minutes
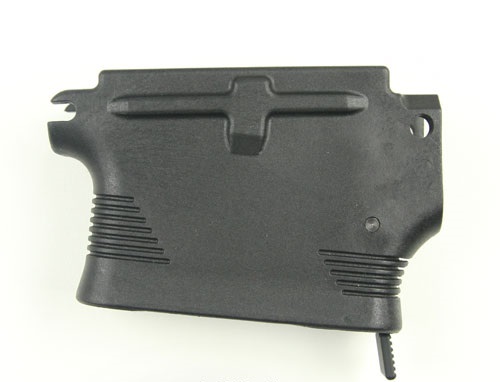
Gently Round the Square Head
Description: The square head on the magazines can interfere with changing magazines swiftly. Some players round off the edges (gently!) to improve magazine swap performance.
Mod Type: Functionality
Technical Difficulty: Low
Time to Complete: <15 minutes
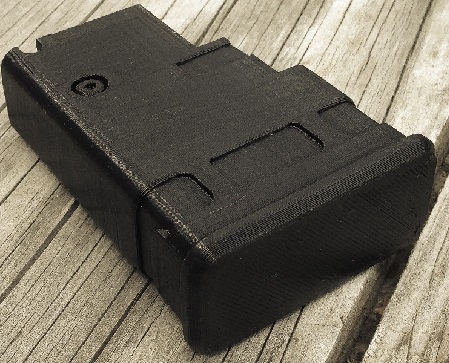
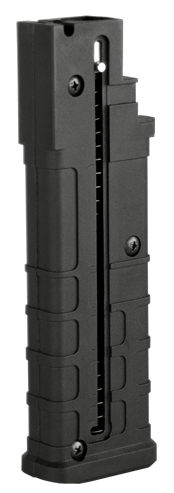
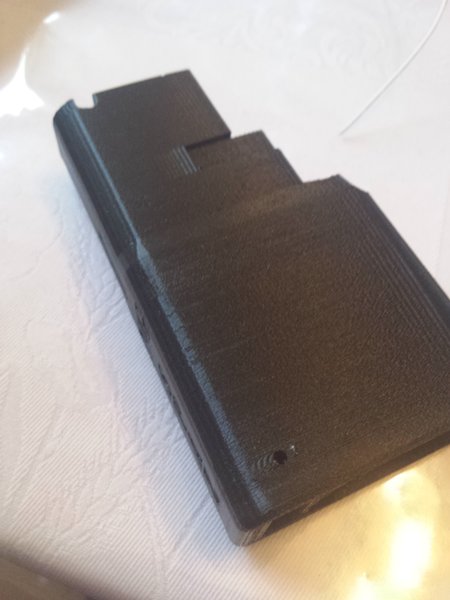
NOTE: This picture is for a KG Factory “dummy” magazine; this image is used strictly as an example of what a short magazine could look like after modification.
4 Round Sniper Chopped Magazine
Description: Sniper builds rely on stealth and maintaining a low profile, often in a prone position The standard 9 round magazine is tall and can interfere with such operations. To remedy this players have either chopped their magazines into a shorter profile, or if they had access to a 3D printer, they have 3D printed shorter magazines.
Mod Type: Functionalilty, Aesthetics
Technical Difficulty: High, precise measurements required
Time to Complete: >60 minutes
[section label=”Miscellaneous Modifications” anchor=”Miscellaneous Modifications”]Miscellaneous Modifications
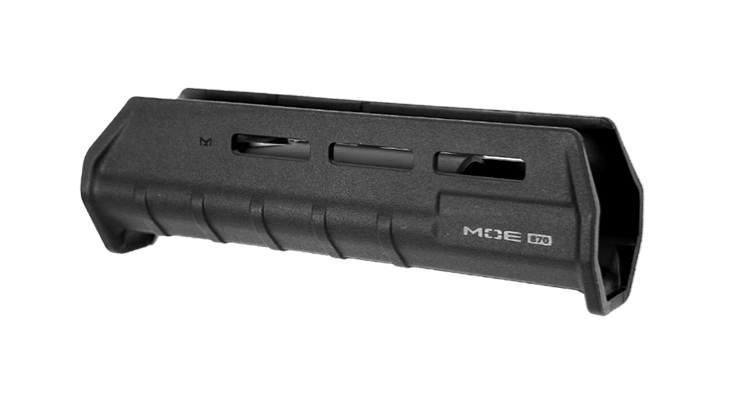
Description: For shotgun builds a popular modification is to take a shotgun style pump handle and graft it onto the Hammer’s existing handle. Due to the aggressive and modern look, Magpul is a popular choice among players.
Mod Type: Aesthetics
Technical Difficulty: High; requires a high degree of cutting, shaping and sanding
Time to Complete: >60 minutes
Cost: $-$$$
[section label=”Players Gallery” anchor=”Players Gallery”]Players Gallery
[g-slider gid=”1504″ width=”100%” height=”75%”]
[section label=”Troubleshooting” anchor=”Troubleshooting”]Troubleshooting
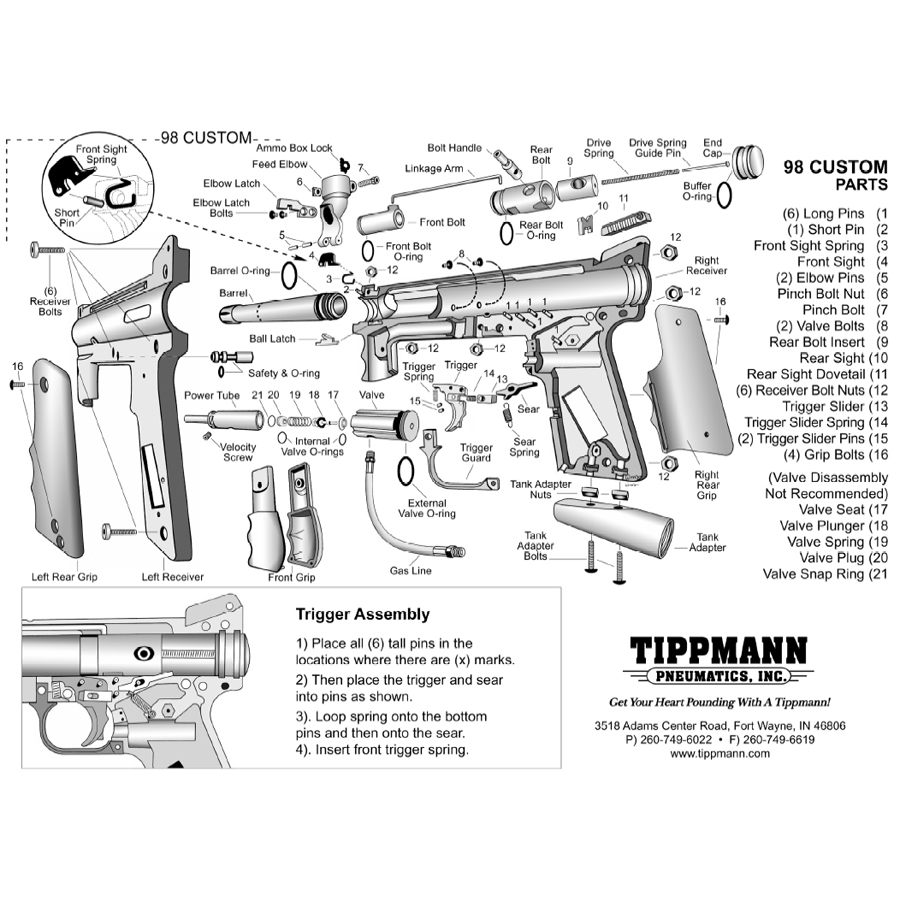
PROBLEM: Air Leaks Down The Barrel
SOLUTION: 1. Cup Seal is bad and needs to be replaced. (SEE CUP SEAL REMOVAL)
SOLUTION: 2. The Power Tube Valve Seat could be nicked / scratched and needs to be replaced.
NOTE: Never remove the Power Tube Valve Seat unless specific repairs are needed.
PROBLEM: Paintballs Break In The Marker
SOLUTION 1. If the weather temperature is below 59°F (15°C) or above 86°F (30°C) paintballs can become brittle and not hold up to the Markers Velocity and outside temperature. Paintballs have a shelf life and can become too frag-ile for use. Paintballs can take a different shape in time so would be wise to size the paintball with your barrel. Dirt or broken paint shell fragments in the barrel can cause the Marker to continue breaking more paint down the Barrel. Using a squeegee down the Barrel will remove most of the dirt or broken shell fragments. (SEE SQUEEGEE CLEANING OF THE BARREL AND BREACH)
SOLUTION: 2. If your pumping the Marker and don’t have a consistent rhythm while the loader is feeding the paintballs can get pinched or wedged in the breach and this could cause a paintball break.
SOLUTION: 3. If the Marker had been cocked twice in a row and loaded 2 paintballs at the same time this could cause a paint-ball break.
SOLUTION: 4. Velocity adjustment is too high and needs to be lowered to proper velocity (fps) speed
PROBLEM: The marker “Burps” when pumped
SOLUTION: 1. Unscrew the pump rod 3-4 turns, continue to adjust as necessary until it is no longer “burping”
SOLUTION: 2. Place a nickle and 2-3 pennies stacked together in the pump handle ahead of the pump rod. Use temporary adhesive to keep in place.
PROBLEM: Low velocity when using HPA
SOLUTION: 1. Ensure your HPA has an output pressure of ~850-950PSI, the same as CO2 as the Hammer 7 is designed to operate at those pressures. (Most HPA tanks output ~800PSI or less).
SOLUTION: 2. Purchase a SHP (super high pressure) regulator or tank that outputs ~850PSI+
SOLUTION: 3. Purchase CO2 tank
PROBLEM: Marker loads 2 rounds (or more)
SOLUTION: 1. Replace detent
SOLUTION: 2. Install an EGO detent in place of a Spyder detent. Edges may require a little trimming to fit correctly. Works best for roundball; may be too soft for FSR only builds.
PROBLEM: Marker won’t cock or jams after maintenance
SOLUTION: 1. Disassemble the marker and ensure the bolt is installed correctly (it can be installed upside down which will cause these issues)
PROBLEM: Magazine Fails to Load the last 2-3 rounds properly
SOLUTION: 1. [solution forthcoming]